
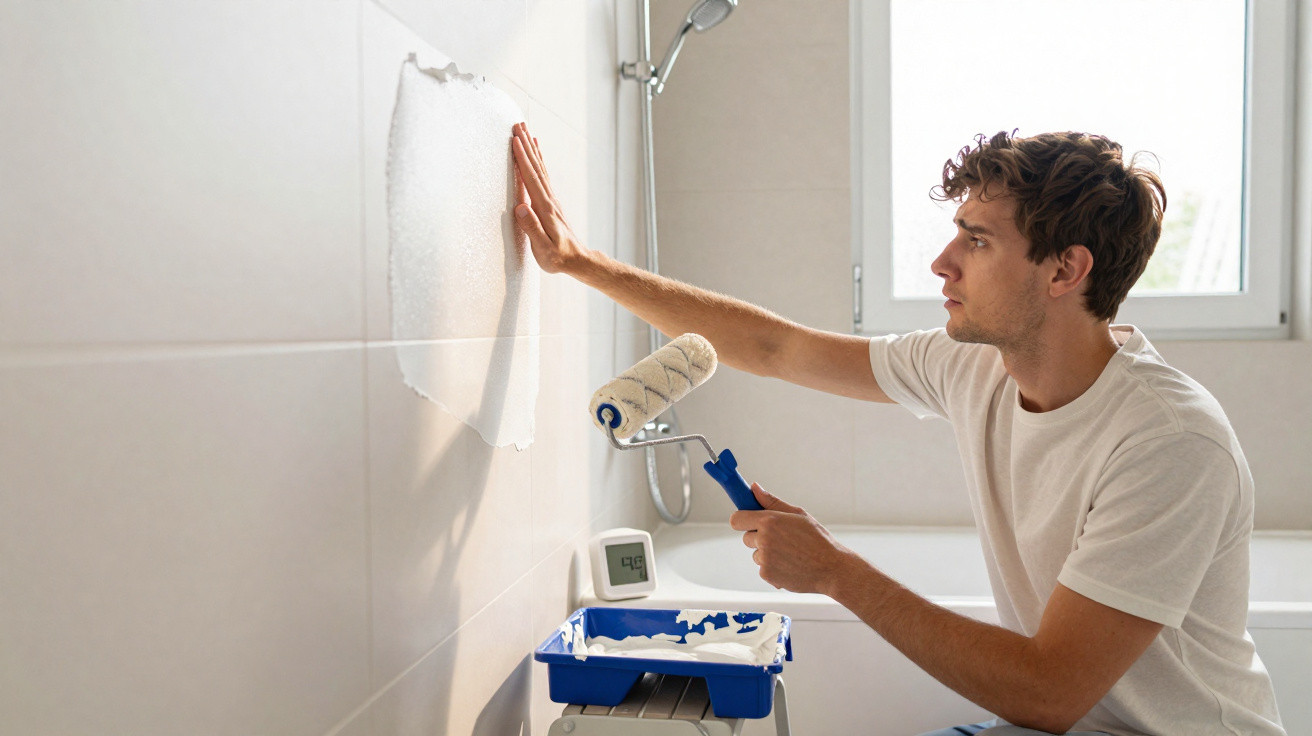
Spring, a fresh coat of paint, total excitement - and yet a year later the dream of the perfect bathroom renovation literally starts falling off the wall.
Plenty of DIYers pick up a roller, repaint the bathroom in one go, and feel delighted at first. The surfaces look smooth, the colour is rich, and everything seems brand new. In damp rooms, though, that kind of quick decision often comes back to bite - sometimes only after six, twelve, or eighteen months. That’s when it becomes clear whether the choice of paint, preparation, and technique was genuinely sound, or simply looked good at the time.
From post-paint pride to an embarrassing problem area
Why a newly painted bathroom looks perfect at first
Straight after painting, everything still seems fine. The roller glides over the wall, marks disappear, and the finish looks even. In smaller bathrooms the change can feel dramatic: brighter, cleaner, and bigger. If you also picked up a bargain during a DIY-store promotion, you feel twice as pleased with yourself.
That’s exactly where the real trap sits: many people reach for a standard interior emulsion, often labelled for “living areas” or “dry spaces”. The tin rarely shouts “not suitable for bathrooms”, so it still ends up on the walls and ceiling of the wet room. The first few weeks pass and it all holds up. That seals the self-congratulation: “See - worked brilliantly. Why spend on specialist paint?”
"The problem in a bathroom rarely shows itself straight away - the real disaster is quietly prepared with every shower."
When the first blisters appear: the usual timeline
Somewhere between month six and month eighteen, the story starts to unravel. At first you notice tiny bubbles, usually on the ceiling or on the wall opposite the shower. Over time they turn into proper bulges - the kind you can spot while standing at the sink brushing your teeth.
These patches have one thing in common: they’re where the most moisture collects. In a small bathroom with little ventilation, humidity levels above 80 percent after a shower are not unusual. Ordinary interior paint simply isn’t designed for that. It absorbs moisture, loses adhesion, and then begins to detach in larger flakes from the wall or ceiling.
What’s really behind peeling paint
How water vapour bursts the paint film from the inside
Every shower creates a dense cloud of warm water vapour. That damp air doesn’t only settle on mirrors and tiles - it pushes into every tiny gap it can find. Once moisture gets behind the paint film, a physical process starts that is difficult to stop.
- Water vapour penetrates the paint layer or tiny hairline cracks.
- The substrate becomes saturated and swells slightly.
- The paint layer separates from the surface, creating voids.
- More moisture accumulates inside those voids.
- Visible blisters form, which eventually burst or flake away.
If you then scratch at a blister, you often pull off whole strips of paint. Underneath, you may find patchy plaster - sometimes even plasterboard that looks slightly softened. At that stage, there’s no real “touching up” solution left: the area has to be rebuilt properly.
Standards-compliant bathroom paint: what professionals look for
In bathrooms, professionals rarely use just any interior paint. They check the labelling, such as products approved for damp rooms or wet areas. Across many European countries, the EN 13300 standard is used for guidance. What matters is that the paint offers very high resistance to moisture and abrasion.
For DIYers, that means: in a bathroom, it’s better to choose a clearly labelled damp-room paint, or a specialist waterproof latex or lacquer-style coating. Modern acrylic paints that are explicitly intended for bathrooms and kitchens also perform well. They contain resins and binders that repel water vapour far more effectively.
"Anyone who uses 'all-purpose interior paint' in a bathroom is putting their paintwork on a time bomb - the question isn’t if, but when it goes off."
How to rescue a damaged bathroom for the long term
The essential rebuild in several steps
If blisters and flaking have already appeared, there’s no way around a thorough repair. Half-measures only buy a few months of peace. A robust rescue plan typically looks like this:
- Scrape or sand off all loose paint completely.
- Let the substrate dry out - if necessary over several days.
- Fill damaged areas and smooth them flat.
- Apply a moisture-blocking bonding primer.
- Finish with two coats of suitable damp-room paint, applied in a cross-coat pattern.
The bonding primer is crucial. It penetrates the surface, consolidates it, and reduces absorbency. At the same time, it forms a kind of buffer between the wall and the topcoat, making it much harder for moisture to work its way in.
Ventilating and dehumidifying properly: without it, you don’t stand a chance
Even the best bathroom paint won’t last if humidity stays too high for too long. If you cut corners on ventilation - or have no ventilation system at all - you create ideal conditions for mould and peeling paint.
The ideal solution is controlled ventilation that automatically removes stale, damp air. In many homes, that means an electric extractor fan that runs with the light switch or continues on a timer afterwards. As a rough guide, an average bathroom should be able to exchange about 30 cubic metres of air per hour. Target: after showering, humidity should drop clearly below 65 percent again.
| Problem | Typical cause | Sensible measure |
|---|---|---|
| Blistering on the ceiling | standard interior paint, poor ventilation | damp-room paint, retrofit an extractor fan |
| Peeling paint on the shower wall | no bonding primer, direct splash zone | bonding primer, possibly partial tiling, specialist paint |
| Grey marks in corners | constant damp, condensation | ventilate, heat, check for cold bridges |
The golden rule when painting a bathroom
Two coats, cross-coating, and patience
If you genuinely want to protect a bathroom, you have to demand more from the roller than a quick once-over. The classic approach from professional practice is two full coats applied in a cross-coat pattern - meaning the first coat more vertically, the second more horizontally. Between coats, allow at least a full day for drying.
That pause may feel tedious, but it pays off. During this time, the paint can cure fully and form a stable, as-sealed-as-possible surface. If you repaint too soon, you smear the film, trap residual moisture, and weaken the entire layer structure.
How to avoid mistakes before the roller even comes out
The most important step happens before you buy anything in a DIY shop or online. Spending a few minutes choosing correctly prevents most later issues on the wall:
- Only use products explicitly approved for bathrooms, kitchens, or damp rooms.
- Look for notes about scrub resistance class and moisture resistance.
- In splash zones (right by the shower or bath), consider tiles, specialist coatings, or particularly robust systems.
- Before painting, check whether there are draughts, cold bridges, or corners that stay damp.
Practical tips for long-lasting walls in damp rooms
What many underestimate: daily habits matter more than the product
Even with the “right” paint, a bathroom can be ruined if day-to-day use doesn’t fit the space. If you shut the door after showering, don’t use an extractor, and leave wet towels hanging indoors, you create a tropical microclimate. In those conditions, paint has little chance of staying intact.
Useful everyday routines:
- After showering, ventilate strongly for at least ten minutes or let the fan continue running.
- Don’t dry wet towels in a closed bathroom.
- Leave a small gap at the door so moisture can escape.
- In very small, windowless bathrooms, use a hygrometer regularly to keep an eye on humidity.
Anyone who has already had to redo a supposedly successful bathroom makeover because of blisters and peeling won’t dismiss these details as trivial again. In the end, it’s not just about appearance - it’s also about protecting the building fabric. Damp walls can develop mould over time, soften plasterboard, and in the worst case even affect structural components.
Especially in spring, it’s worth taking a critical look up at the ceiling and into the corners of your bathroom. Small blisters, dull patches, or fine hairline cracks are often early warnings of bigger problems. If you respond in time - with the right paint, a bonding primer, and improved ventilation - you can avoid a full strip-out later and approach the next colour change with a much calmer mind.



Comments
No comments yet. Be the first to comment!
Leave a Comment