
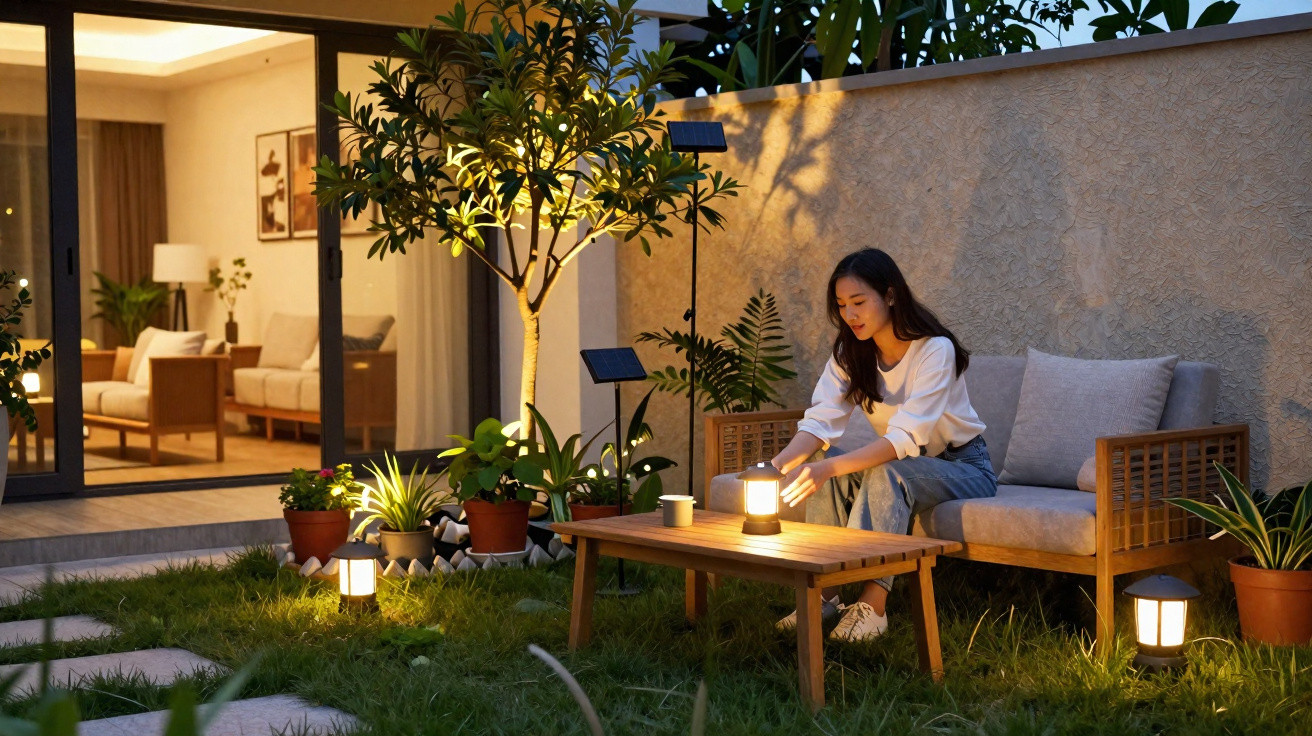
With a few small adjustments, it can feel lively again.
Most people picture a snug, cinema-like garden as something that demands tradespeople, buried cables and a hefty budget. In practice, a few well-chosen lighting changes-done in under half an hour-can transform a bleak patch of grass into a warm winter view you genuinely enjoy.
Why your garden feels like a car park at night
It’s rarely that there isn’t enough light. Far more often, it’s the wrong kind of light in the wrong places.
A lot of homes depend on one strong floodlight above the garage or back door. That sort of beam flattens everything, strips away texture and makes plants merge into one. When there’s frost or snow, a hard white light can bounce back as a chilly bluish glare-more warehouse than somewhere you’d want to unwind.
"Outdoor comfort starts with tone, not power: gentle, warm light beats a blinding security beam almost every time."
Lighting specialists describe colour “temperature” in Kelvins. For an inviting winter garden, look for warm tones between 2700K and 3000K. It’s the same feel as candlelight or a fire: bark appears deeper in colour, stone looks less harsh, and snow reflects a soft gold rather than an icy blue.
How to get the right colour in 20 minutes
You don’t need any specialist kit to correct colour temperature. Most current LED bulbs show it clearly on the packaging.
- 2700K: very warm, close to candlelight, ideal for cosy corners
- 3000K: warm white, suited to paths and terraces
- 4000K and above: cooler white, best kept for work areas or security only
Replace any cold-white bulbs in outdoor fittings with 2700–3000K options. If you’re buying portable or battery-powered lights, pick ones that explicitly say “warm white”. It’s a quick swap, usually tool-free.
"Warm light on a bare winter tree can look more inviting than a full summer border lit in cold white."
Stop lighting the empty space and start lighting the story
A common slip is edging a path with identical solar posts, evenly spaced like runway markers. It does show where to walk-but not much else. The lawn stays featureless, shrubs disappear, and the whole garden can feel smaller than it really is.
Effective outdoor lighting treats the garden like a small stage: you decide where the “actors” are and where the eye should land first.
Pick your stars before you pick your spots
At night, stand at the living-room window and take in the view. Choose three to five features that deserve attention:
- a gnarled trunk or an interesting branch pattern
- a stone wall, fence panel or textured façade
- ornamental grasses that catch the wind
- a large pot or a sculpture near the terrace
Set a small spotlight at the base of each feature and aim it upwards or across the surface. Up-lighting and side-lighting reveal forms you don’t notice in daylight: branches cast long shadows, grasses glint, and even a plain timber fence gains depth.
"Lighting a single tree well often has more impact than lighting your entire lawn badly."
Why darkness is not the enemy of a cosy garden
Many people try to cure a gloomy garden by adding fixture after fixture. The end result can resemble a supermarket car park: nowhere for your eyes to pause, and a bright haze through the window.
In lighting design, darkness functions like silence in music. It creates rhythm and makes the bright moments matter.
Keep deliberate gaps between lit zones. Let sections of lawn or hedge soften into shadow. The contrast makes the highlighted areas look brighter without using more energy.
"The most atmospheric gardens at night are not the brightest ones, but the ones with confident shadows."
This lighter touch also benefits wildlife. Moths, bats and hedgehogs can struggle under constant artificial light. By leaving some areas darker-especially further from the house-you cut light pollution and support nocturnal creatures that help keep the garden in balance.
No electrician, no drilling: the rise of “nomad” lighting
Not long ago, a well-lit garden usually meant wiring, digging and paying an installer. Cordless options now make it far easier-particularly for renters and anyone wary of permanent changes.
| Type of light | Best use | Main advantage |
|---|---|---|
| Solar spotlights | Highlighting trees, walls, statues | No wiring, charge during the day |
| Rechargeable table lamps | Terraces, balconies, dining areas | USB charging, move as needed |
| Battery-powered fairy lights | Railings, pergolas, shrubs | Soft background glow, easy to install |
Today’s solar lights store more power and can still perform after grey winter days. Many include sensors so they switch on automatically at dusk. Rechargeable lanterns-often topped up via USB-C-can last a full evening on one charge, then simply come indoors again.
The biggest advantage is freedom to experiment. You can try out different locations, angles and heights without drilling holes or committing to permanent cabling.
"Think of cordless lights as garden furniture: you rearrange them with the seasons and with your mood."
Turning the garden into a visual extension of your living room
Once the light is warmer and more precisely aimed, the garden stops reading as a dark blank space beyond the glass. Instead, it starts to feel like another room.
From the sofa, your gaze can follow a softly lit route: along a path, up to a glowing tree, and then to a pot on the terrace. With enough exterior light to hold attention, the window is less likely to act like a mirror at night.
That sense of depth can even make a small flat feel more spacious. A balcony with a warm table lamp and one illuminated planter adds distance to the indoor view. You might not go outside in January, but your mind still registers the extra “room”.
Practical 20-minute makeover: a simple scenario
Picture a typical suburban garden: patio, rectangular lawn, fence, and a single small tree.
- Minutes 1–5: turn off the harsh security floodlight and, if you can, fit a 2700K LED bulb instead.
- Minutes 6–10: position a solar or battery spotlight at the base of the tree and aim it up through the branches.
- Minutes 11–15: add a rechargeable lamp or string lights around the seating area to create a warm “island” on the patio.
- Minutes 16–20: go back inside, switch off any other garden lights, and assess the view. Adjust beams to prevent glare through the window.
After three small changes, the view gains layers: a cosy terrace, a highlighted tree, and darker space beyond. The garden feels deeper and more secluded, and you’ve done it without calling an electrician.
Key terms and small risks worth knowing
Two phrases you’ll often see on boxes are “IP rating” and “lumens”. The IP rating indicates how well a fitting resists water and dust. For an uncovered garden, aim for at least IP44; for ground spots that take heavy rain, higher numbers offer extra peace of mind. Lumens measure brightness, and for accent lighting you seldom need large figures-about 100–300 lumens per spotlight is usually enough for a gentle effect.
A few sensible checks keep things safe and comfortable. Don’t place bright lights at eye level where they shine straight into neighbours’ windows or towards passing drivers. If the manufacturer recommends it, bring rechargeable units indoors during severe frost. And if you use plug-in lights, keep cables away from walkways where someone could trip.
Used carefully, portable warm lighting does more than add decoration: it changes how long winter nights feel, turns a black rectangle into a living picture, and can make staying in feel like a pleasure rather than a compromise.






Comments
No comments yet. Be the first to comment!
Leave a Comment