
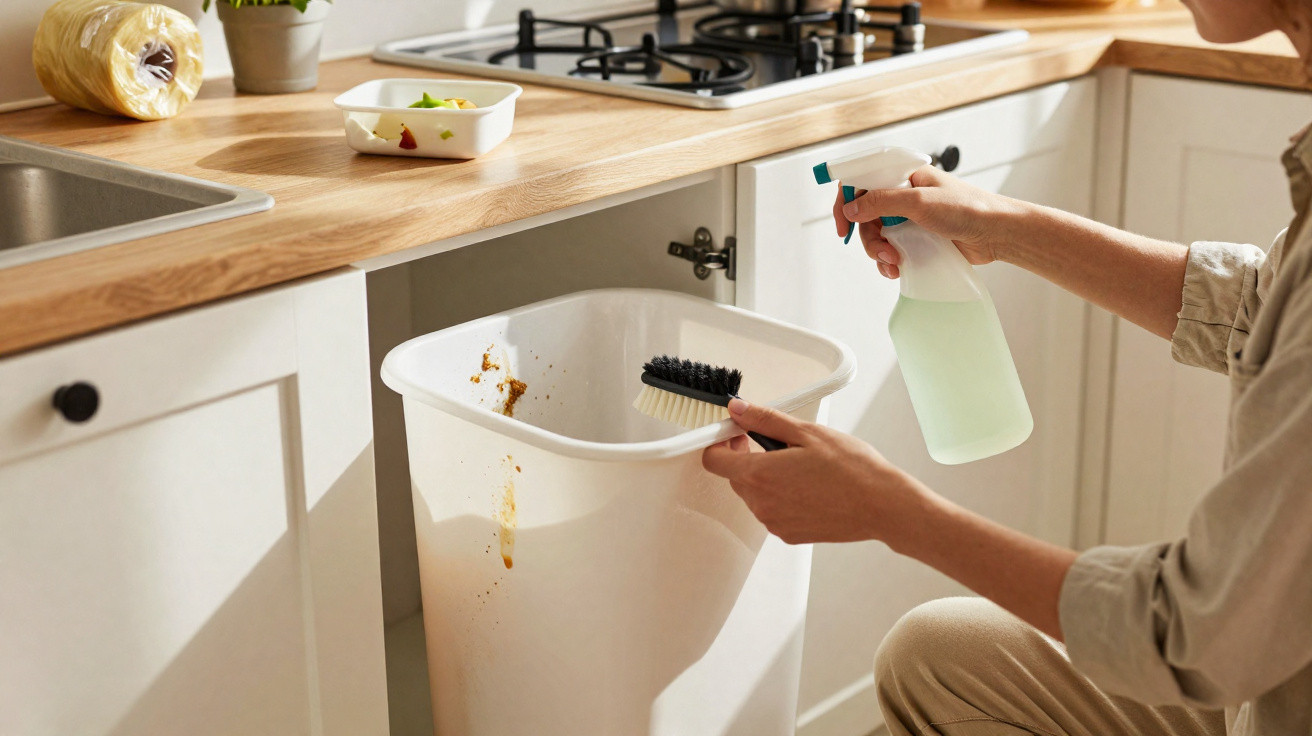
Between fresh food, spotless crockery and gleaming worktops, it often sits innocently in the corner: the kitchen bin. Change the liner, shut the lid, job done - that’s how it works in most homes. But that’s exactly where the trouble starts. Beneath the bag, a cocktail of liquid, grease and food residue can collect and quietly turn into a real breeding ground for germs.
Why the kitchen bin is so disgusting
Plenty of people assume that as long as there’s a bin liner inside, everything stays clean. In practice, that simply isn’t true. Liners can tear, slip out of place or develop tiny pinholes. Liquid from meat packaging, leftover sauces or pasta water can seep slowly into the bin itself.
"Over time, a thin, slimy film of organic material forms inside the bin - a perfect breeding ground for bacteria and mould."
The result is an unpleasant smell even with the lid closed. Many people try to mask it with room spray or scented fresheners instead of dealing with what’s actually causing it.
On top of that, the bin ends up holding things we’d never tolerate elsewhere - spoiled food, greasy packaging, wet wipes, bones, raw meat scraps. If that mess landed on the worktop, we’d wipe it up straight away; in the bin, it can sit unnoticed for days.
Hygiene experts repeatedly point out that the kitchen bin is among the dirtiest surfaces in the entire home. In many studies, even the toilet seat comes out looking better - largely because it’s cleaned far more often.
How often the bin really needs cleaning
If we’re honest, many of us only wash the bin when it’s visibly smeared or the smell becomes unbearable. Specialists take a tougher view. Their advice is to give it a thorough clean about once a week, or at the latest after every third or fourth liner.
In a lot of households that sounds excessive. A more realistic routine is roughly every two weeks - as long as nothing leaks. Because there’s one rule with no exceptions:
"If the liner has a hole or there’s liquid sitting in the bin, it must be cleaned immediately - not tomorrow, not "at the weekend"."
The longer that mess sits, the faster germs multiply and the stronger the odour becomes. Acting quickly saves a lot of effort later.
How to clean the kitchen bin step by step
You don’t need specialist products for a proper clean. Most of what you need is already in a typical household.
A simple step-by-step guide
- Empty the bin completely and remove any larger residue by hand or with a disposable scraper.
- Part-fill the bin with hot water and washing-up liquid. Hot water helps break down grease; washing-up liquid lifts grime and reduces odours.
- Spray the inside walls with a cleaning or disinfectant spray and leave it to work for a few minutes.
- Rinse thoroughly so no cleaner remains inside.
- Dry it completely with kitchen roll or a clean cloth, especially the base and edges.
- Wipe the outside with a damp cloth - grease marks, dust and fingerprints often build up there.
A handy way to cut the effort: put the bin in the shower or bath and rinse it out using the shower head. It’s quicker, easier on your back, and avoids carrying a large container of water across the kitchen.
Everyday habits that keep the bin cleaner
If you want to scrub the bin less often, a few simple routines make a big difference - particularly with wet waste and anything strongly scented.
Handling damp leftovers properly
These are especially troublesome:
- leftover sauces, soups and stews
- packaging from raw meat or fish
- greasy pizza boxes or cling film
- spoiled food cleared out of the fridge
It’s best not to drop this sort of waste straight into the liner. Instead, wrap it briefly in kitchen roll, old newspaper or a paper bag before throwing it away. Liquids - for example, from defrosting meat - can be poured down the sink before the packaging goes in the bin.
In summer, just one day can be enough for unpleasant smells to intensify dramatically. The drier the rubbish, the more slowly that rotten odour develops.
Changing bin liners in good time
Many people wait until the liner is overflowing and the lid barely shuts. Hygienically, that’s the worst option. In a half-full bag, a bit of air and moisture movement is still possible; in an overstuffed liner, you create a warm, damp chamber.
"Changing the liner earlier saves cleaning work in the end - especially on hot days."
In flats without a cool cellar space, it’s worth adjusting your habits during warmer months: dispose of smaller liners more often, rather than leaving a few large bags sitting around for days.
Less waste in the bin: compost and smart alternatives
If you keep organic waste out of the kitchen bin from the start, odours become far less of an issue. In many areas there are food-waste caddies or council compost collections; in the countryside, plenty of people use a home compost heap.
Typical waste that works well in a food-waste bin or on a compost heap:
| Type of waste | Suitable for food waste/compost? |
|---|---|
| Coffee grounds and paper filters | Yes, very suitable |
| Vegetable and fruit peelings | Generally yes |
| Eggshells | In small amounts |
| Cooked food leftovers | Sometimes allowed depending on local rules - check first |
Coffee grounds, in particular, often end up in general waste for no good reason. They can be excellent as a fertiliser for certain plants and can even absorb smells if dried and placed in the fridge or a shoe cupboard.
Risks to health and the kitchen’s air quality
A filthy bin isn’t just unpleasant - it can also bring health risks. In a combination of moisture, grease and organic residue, bacteria and mould spores thrive. These can be spread through the kitchen air, especially when the lid is opened frequently.
People with allergies or sensitive airways often react more strongly to that kind of exposure. And there’s another issue: bins that are open or don’t close properly attract insects. Fruit flies, maggots in summer, and in the worst cases even cockroaches - the jump from mildly whiffy to truly revolting is shorter than many expect.
Useful home remedies for odours
Alongside regular cleaning, a few simple household items can help keep smells under control. They don’t replace cleaning, but they can help between washes.
- Sprinkle one to two tablespoons of bicarbonate of soda onto the base of the empty, dry bin.
- Alternatively, add a thin layer of cat litter before inserting the liner.
- Place a sheet of newspaper on the bottom to absorb any minor leaks.
Bicarbonate of soda neutralises odours, while cat litter absorbs moisture. Even so, it’s important to check the base of the bin briefly whenever you change the liner.
Why a weekly clean really is worth it
Once you’ve properly cleaned the bin, the difference is usually immediate: the whole kitchen feels fresher, even if nothing else has been cleaned. People often underestimate how much one smelly corner can dominate the air in a room.
It helps to build the bin into an existing cleaning routine - for example, whenever you check the fridge or mop the floor. That way, an “awkward, disgusting job” becomes a quick extra step within a set routine.
Over time, it pays off: the bin lasts longer, staining and stubborn build-up are less likely to form, and unexpected visitors won’t be greeted by a musty smell drifting out from the kitchen corner.




Comments
No comments yet. Be the first to comment!
Leave a Comment