
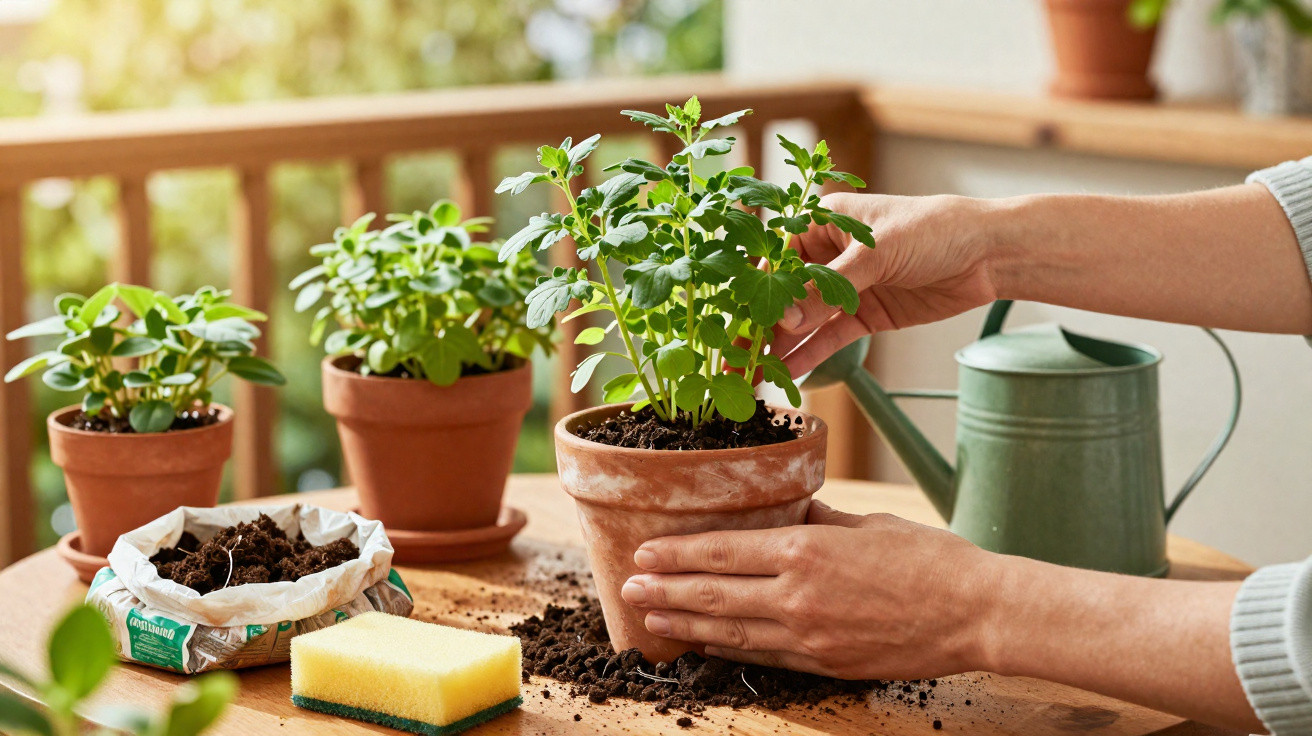
Written off in the kitchen cupboard, a small washing-up sponge can suddenly become a quiet lifesaver for thirsty plants out in the flowerbed.
As the gardening season gets going, the first sunny spells are broken up by chilly nights, rain is slow to arrive, and plenty of hobby gardeners find themselves battling pots and beds that dry out fast. Yet the answer is often sitting right by the sink: an old washing-up sponge-prepared properly and tucked into the soil-can hold onto water, protect roots and even give your compost a helpful nudge.
Why a washing-up sponge becomes a springtime water manager
In spring, plant roots are especially delicate. Days lengthen and the sun strengthens, but watering routines haven’t always settled into a rhythm. Sometimes plants get too much water, sometimes not enough-and window boxes and pots can dry out quickly, particularly in exposed, windy spots.
That’s exactly where a washing-up sponge comes into its own. Its porous texture works like a tiny reservoir:
"Placed in a flowerpot, the sponge absorbs excess watering and releases it back into the soil little by little-almost like a drip system without any kit."
That means:
- the compost or soil dries out more slowly,
- roots are less likely to suffer sudden "thirst shocks",
- you can stretch the time between waterings a little-handy if you’re away for a short while.
This trick is particularly useful for:
- window-box plants such as geraniums, petunias or herbs,
- delicate young plants with shallow root systems,
- small pots that sit in strong sun.
How the sponge trick works in a flowerpot
It’s surprisingly straightforward and doesn’t require any pricey gadgets. Step by step:
- Clean an old washing-up sponge thoroughly (more on that below).
- Prepare the pot: place broken crocks or gravel over the drainage holes.
- Lay one or two sponges flat on top of the drainage layer.
- Add the potting compost and position the plant.
- Water well so the sponge can soak up moisture.
With that, the sponge sits under the soil like a damp cushion. When you water, any surplus runs down, the sponge drinks it in, and then releases moisture again as soon as the compost starts to dry.
Compost booster: when the sponge disappears into the heap
It’s not only pots that benefit. Sponges made from natural materials can be unexpectedly helpful in compost. They help the heap stay moist and give microorganisms extra structure to work with.
"In compost, a natural sponge behaves like a sponge in the woods: it holds rainwater, keeps the environment damp and supports tiny organisms as they break things down."
Which sponges are suitable for compost
These are generally fine:
- cellulose sponges,
- luffa (loofah) sponges,
- other kitchen sponges clearly labelled as "natural" and free from plastic content.
Completely unsuitable for compost are sponges made from:
- the typical yellow-and-green plastic,
- foam with plastic content,
- versions with a scouring pad made from plastic fibres.
These products can release microplastics and residues, and they don’t belong anywhere that might later grow vegetables.
How to use sponges in compost properly
If you have a natural sponge, the best approach is:
- After using it in the kitchen, clean the sponge thoroughly.
- Cut it into small pieces-around 2–3 cm per side.
- Mix the pieces loosely through the compost, ideally into the middle layer.
The fragments soak up water, help the heap stay damp for longer, and add a little air into the structure. In spring, when a compost heap is "waking up" after winter, steady moisture is a real plus for soil life.
Safety first: disinfecting and preparing the sponge properly
A used washing-up sponge isn’t a harmless object. In the kitchen it collects grease, cleaning agents and bacteria, so it shouldn’t go straight into a pot as-is.
"A damp washing-up sponge left lying around for hours is a genuine bacteria hotel-so treat it thoroughly before it goes anywhere near the garden."
Simple ways to clean it
Before you use a sponge in the garden, give it a short "treatment":
- Rinse extremely well: under hot water until no suds remain.
- Boil it: leave it in boiling water for a few minutes.
- Vinegar treatment: soak with plain household vinegar, leave to work, then rinse again.
- Microwave (only for damp sponges with no metal parts): two minutes on full power to kill germs.
Important: once a sponge has been through this process and used for the garden, it should never go back into kitchen service. Once it’s a garden sponge, it stays a garden sponge.
Four clever garden uses for an old washing-up sponge
1. Moisture depot in a pot
The classic option: use it as a water store in a flowerpot or window box. Ideal if you don’t want to water every day or you’re often out. This method can also be useful in a greenhouse-for example with tomatoes grown in containers.
2. A helper for sowing and raising seedlings
With a knife, you can cut a sponge into small cubes. Place one seed in each cube. The moistened sponge cube creates a perfectly damp (but not soggy) bed for germination.
Once the seedling is about 7 cm tall, you can plant the whole cube-roots and all-into a pot or into the bed. The sponge will rot over time (with natural versions) or remain in place as a moisture cushion.
3. Light protection from cold and pests
Laid flat on the soil and weighed down with a stone, a sponge can offer a little protection around the base of sensitive plants during late frosts. The air held inside the material slightly buffers temperature swings.
If you also add a few drops of strongly scented essential oils-often considered deterrents in the garden (for example peppermint or lavender oil, heavily diluted)-some crawling visitors are more likely to avoid that area. Don’t overdo it: plants can react badly to oils that are too concentrated.
4. Extra moisture support for patio containers
Large container plants such as olive trees or small citrus trees can suffer quickly when wind pulls moisture from the surface. One or two sponges placed flat just under the top layer of compost can act as an additional buffer, storing water from each watering and releasing it more evenly.
Which sponges can go into the garden-and which can’t
It’s worth checking the material before your sponge leaves the kitchen for good.
| Type of sponge | Use in pots | Use in compost |
|---|---|---|
| Cellulose sponge | Yes, as a water store | Yes, if largely free of cleaning residues |
| Luffa (loofah) sponge | Yes, ideal for natural gardens | Yes, breaks down over time |
| Plastic sponge (yellow-green) | Limited use in pots; don’t bury it in vegetable-growing areas | No, because of microplastics and residues |
| Foam sponge | Only short-term in pots; better avoided | No |
If you want to keep your garden as low in pollutants as possible over the long term, it makes sense to choose natural options at the buying stage. They can later be used far more comfortably in compost or beds.
How to tell when the sponge has had its day
Even in the garden, a sponge won’t last forever. It’s worth checking pots and beds regularly. Clear signs it’s time to retire it include:
- a strong, unpleasant smell,
- visible mould,
- the material breaking down into crumbly bits,
- a slimy surface.
Natural sponges in this condition can still go into the compost-provided they aren’t heavily contaminated with cleaning products. Plastic sponges, on the other hand, should go into general waste.
Why the sponge trick is more than a gimmick
Reusing old washing-up sponges in the garden doesn’t only help plants-it also cuts down what you throw away. Over a year, a household gets through plenty of sponges, and some of them can keep doing useful work instead of heading straight for the bin.
Especially during longer dry spells, any small water store becomes interesting. If you water your containers a bit more intelligently, you can be more relaxed about watering and reduce the risk of window boxes drying out after a warm weekend.
For many hobby gardeners, it’s worth a simple trial: one pot with a sponge, one pot without-then compare which compost is still damp after three sunny days. Often you’ll notice the difference just by feeling the compost by hand.
If you also switch consistently to sponges made from natural fibres, you gain a practical garden helper that can, in the end, return to the material cycle. That’s how an unremarkable kitchen item becomes a quiet professional for water management and soil life.


Comments
No comments yet. Be the first to comment!
Leave a Comment