
Once the festivities are over, plenty of people feel the urge to rearrange pictures, shift shelves and rethink the room.
And that’s often when an annoying issue on the wall comes to light.
The décor may be coming down, but the plastic wall plugs are still there - embedded in the plaster like unwanted reminders. Yanking them out on impulse can turn a harmless little hole into a crater that’s hard to disguise. With a bit of know-how and a few simple precautions, you can remove those plugs, fill the holes and get the wall ready for its next chapter, with no visible marks.
The “Swiss cheese” wall problem
Anyone who’s lived in a rented flat will recognise the scene: the TV comes off the wall, a shelf is dismantled, the curtain bracket is removed… and once you look past the paint you’re greeted by a patchwork of old holes, tired wall plugs and messy repairs.
At that point, many people grab whatever pliers are to hand, tug hard on the plug and hope for the best. In reality, it usually goes the other way: the plaster blows out around the fixing, paint flakes off, the hole widens and the “quick fix” turns into a proper masonry repair.
"The biggest enemy of a wall isn’t the drill - it’s the rush to undo what was installed."
Why you shouldn’t rip a wall plug out in one go
A wall plug is designed specifically not to come out easily. In solid walls, small ribs and barbs lock the plastic inside the drilled hole. In plasterboard, the plug body opens up behind the board, forming a kind of “anchor”.
When you pull aggressively, it’s the plaster that gives way - not the plug. Weaker plaster, clay block or concrete can fracture around the fixing, and the damage spreads into a cone shape that’s far wider than the original drill bit.
That leaves you with: more filler to apply, longer drying time, a tougher job getting the surface flat, and a larger area that needs repainting.
The screw-and-pliers method: wall surgery
There’s a far more controlled way to remove a wall plug using basic tools that most people already have at home: a screw and a pair of tweezers or pliers.
Basic tools for a tidy job
- A screw that matches the wall plug diameter
- Fine-nose tweezers or long-nose pliers
- A filling knife or decorator’s spatula
- Filler or repair plaster (ready-mixed or powder)
- Fine sandpaper (120 or 180 grit)
- A piece of cardboard or thin wood to protect the wall
With this simple kit, the job stops being “brute force” and becomes something much closer to careful precision work.
Step 1: create a “handle” on the wall plug
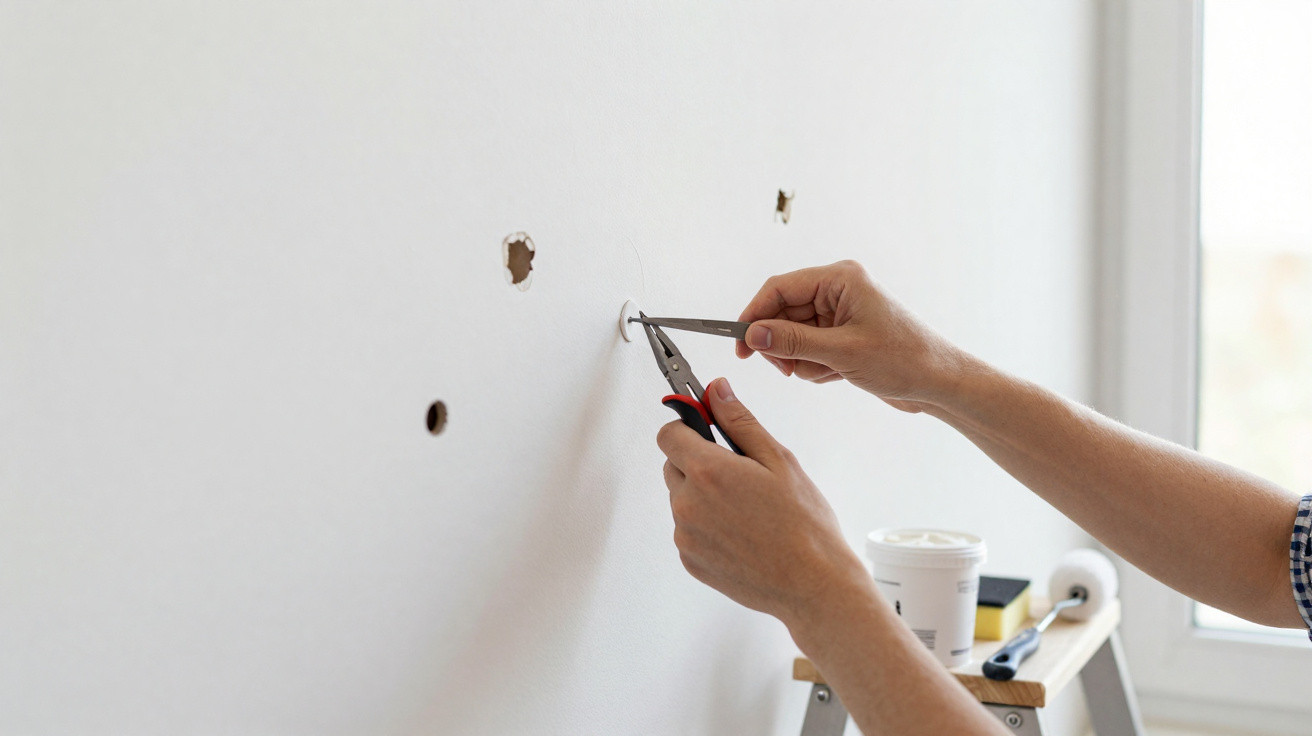
Start by giving the old plug something to grip. If its rim has been cut flush with the wall, there’s nothing to grab. The fix is to partially screw a screw into the centre of the plug by about 1–2 cm.
That screw becomes a solid hook. Instead of stressing brittle plastic, you’re working against metal, which tolerates pulling force and the small movements needed to free the plug.
Step 2: lever movement, not a hard pull
With the screw in place, hold the screw head with tweezers or pliers. Rather than hauling it straight out with maximum force, use a controlled levering action.
"Short, gentle rocking movements loosen the wall plug without destroying the surrounding plaster."
Rest your tool against a piece of cardboard or thin wood so you don’t scuff the paint, and use that as a fulcrum. Alternate a slight rock from side to side while keeping steady, moderate tension.
In most cases, the plug will start to creep out - millimetre by millimetre - until it comes out whole. The hole is left close to its original diameter, ready for filler.
How to fill the hole without leaving a raised patch
Once the plug is out, the goal is to turn that clean hole back into a flat surface that’s ready for paint. This is where many DIY repairs go wrong: too little filler, poor application, over-sanding, and a patch that shows up under side lighting.
Choosing the right filler
For typical wall plug holes, ready-mixed fillers in a tub are usually a good choice: easy to apply and quick to dry. For larger holes - or where surrounding plaster has come away - powder products that set via a chemical reaction often shrink less and end up harder.
| Hole size | Recommended product | Main benefit |
|---|---|---|
| Small holes (standard wall plug) | Ready-mixed filler paste | Fast, straightforward application |
| Medium or uneven holes | Powder filler for plaster/render | Less shrinkage as it dries |
| Heavily damaged areas | Mortar or reinforced plaster | Greater mechanical strength |
Application: a controlled excess helps
Use the spatula to press filler right into the hole, packing it down to the back. Trapped air pockets can turn into tiny dips once everything dries.
Leave the filler slightly proud of the surface, forming a small “bump”. You’ll level that down when sanding, which helps you end up perfectly flush with the original wall.
"A slight excess of filler is easier to correct than a shallow patch that needs a second application."
Use cross strokes with the knife - horizontal and vertical - to bring the repair close to level and to leave a more even pre-finish.
The final secret: sand and paint without giving the repair away
After the manufacturer’s recommended drying time, it’s time to make the patch disappear - visually and to the touch.
Gentle sanding, checked by touch
With fine sandpaper, sand lightly in small circular motions. The aim is only to flatten the filler “bump” to the wall level, not to gouge it out. Every few seconds, stop and run your hand over the area.
Your fingertips usually pick up ridges and dips that your eyes miss. When you can’t feel the boundary between the repaired section and the original wall, it’s ready for paint.
Feathered painting to avoid a “square patch”
If you still have the same type and colour of paint, you’re in the best position. Using a small roller or a soft brush, apply a modest amount of paint to the repaired spot and then immediately spread it outwards with progressively lighter, broader strokes.
That soft transition creates a near-invisible blend between the new paint and the old. If someone doesn’t know where the hole was, they’re unlikely to spot the repair once it’s dry.
"The trick isn’t hiding the hole - it’s disguising the edge of the new paint."
When it’s worth filling, and when it’s better to reuse the hole
Not every hole needs to be written off. In some situations, reusing the fixing point makes more sense than filling it and drilling again a few centimetres away.
- If the hole is sound, with no sign of loose plaster
- If the new item will sit in the same area
- If the wall plug is still in good condition or can be replaced with one of the same diameter
To reuse it, simply check that the plug is secure and choose a screw suited to the intended load. For heavy shelves and TV brackets, it’s sensible to consult the wall plug manufacturer’s stated weight limit.
The risks of improvised fixes and common “bodges”
A few popular shortcuts can become expensive over time. Improvised materials such as toothpaste, soap, or paper with glue might look acceptable for a few days, but they often crack, shrink, attract dirt or come away.
Another common problem is applying filler over dust or flaky paint. Adhesion suffers, and months later the patch can fall out in one piece - revealing the hole again, sometimes even larger.
Planning your décor with the “exit” in mind
One approach that helps if you change your décor regularly is to keep fixings aligned along the same height band, particularly on feature areas such as behind the sofa or on the TV wall. That way, new pictures or shelves often cover older fixing points.
Another practical option is to use picture rails, tracks or battens fixed with fewer anchoring points, so you can hang multiple items without multiplying holes across the whole wall.
For renters, being confident at removing plastic wall plugs and filling holes can even become a bargaining tool: a smooth, well-kept wall reduces the risk of deductions from the deposit and can make the check-out inspection easier.




Comments
No comments yet. Be the first to comment!
Leave a Comment