
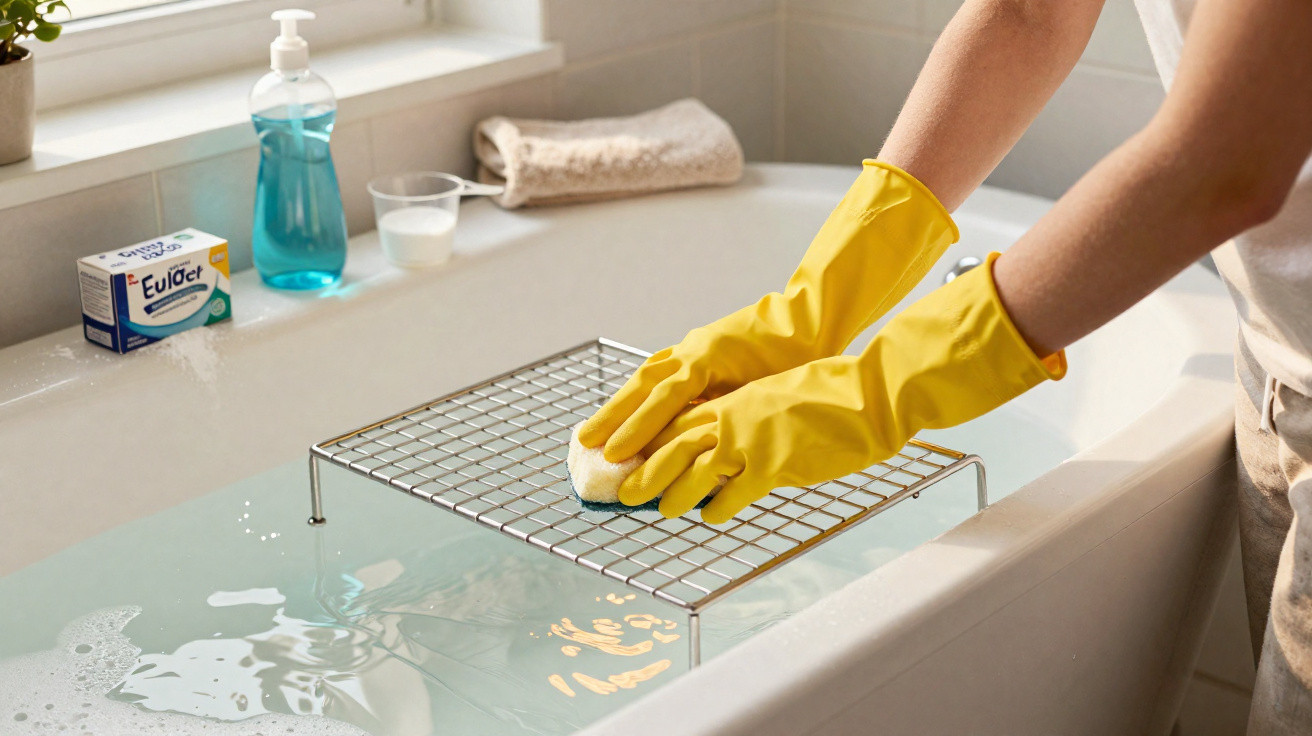
A straightforward approach turns it into an easy job.
Burnt-on fat splashes, baked-on marinade, dark crusts: after a few months of everyday cooking, oven racks can look truly grim. Anyone who has tried scrubbing one in the kitchen sink knows the routine-water everywhere, half the rack sticking out, and hardly any progress. Yet there’s a surprisingly simple fix that most people never try, and it works without harsh chemicals.
Why oven racks stay so stubbornly dirty
In many homes, cleaning the oven itself has become fairly normal: the glass door, the interior panels, sometimes even the trays. The rack, however, often gets left out-and that’s no accident.
- It’s bulky and often won’t fit fully in the sink.
- The gaps and edges are awkward to reach properly.
- Fat and sugar from marinades burn straight into the metal.
- Many people avoid the hassle and put it off “until later”.
When the cleaning products do come out, it’s often a very strong oven cleaner. These can shift a lot of grime, but they also leave a pungent smell, irritate the airways, and may dull or damage the metal surface over time. In short: unpleasant for you and hard on the rack.
An unusual place with a big impact: the bathtub as the secret weapon
The main problem with a rack is its size-and that’s exactly where the solution is hiding in plain sight. Instead of struggling at the sink, simply move the oven rack into the bathtub.
In the bath, there’s enough room for the rack to be fully submerged. That means every bar can soak properly, which is what you need before baked-on grease will loosen at all.
"If you soak the oven rack in the bathtub, you save a lot of scrubbing and at the same time protect the metal-and your nerves."
To avoid damaging the bath’s enamel, use a simple safeguard: lay a thick old towel (or two large towels) on the bottom of the tub. It cushions the rack, helps prevent scratches, and reduces noise when you lift heavy racks in and out.
The mixture: three simple ingredients with a powerful cleaning effect
You don’t need specialist products-just three things most households already have:
- very hot water
- bicarbonate of soda (baking soda, i.e. sodium hydrogen carbonate)
- grease-cutting washing-up liquid
Each ingredient has a clear job:
- Hot water softens dried-on food and hardened grease.
- Bicarbonate of soda provides a mild abrasive action and helps lift greasy, dirty layers.
- Washing-up liquid breaks down fats into smaller particles so they release from the metal.
These approximate proportions work well:
| Component | Recommended amount |
|---|---|
| Bicarbonate of soda | about 150 g per fill |
| Washing-up liquid | about 50 ml |
| Water | enough to fully cover the rack |
If you don’t have a measuring jug, a rough guide is fine: 150 g of bicarbonate of soda is about one generously heaped mug, and 50 ml of washing-up liquid is just under a third of a typical small bottle.
How the cleaning process works, step by step
1. Prepare the bathtub
Place a towel in the dry bath, then set the oven racks on top. If you have more than one rack, you can stack them slightly offset, as long as water can still reach all areas.
2. Fill with hot water
Run hot water into the bath until the racks are completely submerged. The hotter the water, the better it will help loosen the dirt. It doesn’t need to be boiling-very hot tap water is usually enough.
3. Add bicarbonate of soda and washing-up liquid
Sprinkle the bicarbonate of soda evenly across the surface of the water. Then add the washing-up liquid and gently stir with your hand or an old brush to disperse everything. A bit of foam is absolutely fine.
4. Soaking time: patience pays off
Leave it for at least 30 minutes. For normally dirty racks, that’s often sufficient. If the racks haven’t been cleaned for years or have heavy, burnt-on residue, they can stay in the bath for several hours or overnight without any issue.
"The longer the rack sits in the mixture, the more work the water does-and the less scrubbing you’ll need later."
5. Light finishing, not hard scrubbing
After soaking, the loosened grime can be wiped away with a soft brush or the standard sponge side of a washing-up sponge. In many cases, the sponge will glide over the metal because the grease and crust have already lifted.
6. Rinse thoroughly and dry
Rinse the racks with clean water until no suds remain. Then dry them well-either with a tea towel or by air-drying. If you want to avoid rust spots, it’s best to wipe the bars dry before putting the rack back into the oven.
Why this method is kinder to the rack
Compared with aggressive oven cleaners, the bicarbonate-of-soda-and-washing-up-liquid combination is much gentler. It doesn’t attack the protective layer of the metal, and the surface keeps its sheen. Because very little force is needed, brushes and sponges wear out more slowly, and you’re less likely to create micro-scratches.
At the same time, you reduce exposure to harsh fumes-which is a real advantage, not only for anyone with sensitive airways. Homes with children or pets also benefit from the lower-chemical approach.
How often should you actually clean oven racks?
There’s no fixed rule, but a simple guideline helps. If you grill frequently, cook a lot of bakes, or place meat directly on the rack, it’s worth using the bathtub trick after heavier cooking periods.
- Occasional bakers: every 3–4 months
- Heavy use with lots of fat and marinade: about once a month
- After “extreme events” like overflowing bakes: as soon as possible
Keeping to a rough rhythm stops five or six layers of fat and sugar building up. Each clean then becomes noticeably quicker and easier.
What to consider with coated racks and cast iron
Many modern ovens come with chrome-plated or enamelled racks; some models also use cast iron. For the bicarbonate-of-soda and washing-up liquid method, keep the following in mind:
- Chrome-plated racks: generally fine-avoid harsh metal scourers.
- Enamelled racks: use soft sponges; don’t scrape with sharp knives.
- Cast iron: dry thoroughly after cleaning to prevent flash rust.
If you’re unsure, test a small, less visible area before soaking the whole rack. Bicarbonate of soda is very mild, but it’s still sensible to check the oven manufacturer’s guidance, especially with specialised coatings.
Practical add-ons for a consistently cleaner kitchen
To stop your oven rack sliding back into “disaster” territory, a few small habits make a difference:
- When roasting greasy dishes, use a tray underneath to catch drips.
- Once cooled, wipe off any dripped marinade before using the oven again.
- When you next clean the bathtub, plan to do the rack and baking trays at the same time-one job, twice the payoff.
If you use bicarbonate of soda regularly, it can be worth buying a larger pack. It’s inexpensive, keeps virtually indefinitely, and is handy for other household tasks too: cleaning the bottoms of pans, neutralising odours in the fridge, or acting as a gentle scouring powder for the sink.
The bathtub approach is a good reminder of how effective simple materials can be when combined properly. Rather than kneeling by the oven with a specialist cleaner and a face full of fumes, you let hot water, bicarbonate of soda, and washing-up liquid do the work at their own pace. It saves time, spares your patience, and helps the oven rack look much closer to how it did when it first came out of the box.



Comments
No comments yet. Be the first to comment!
Leave a Comment