
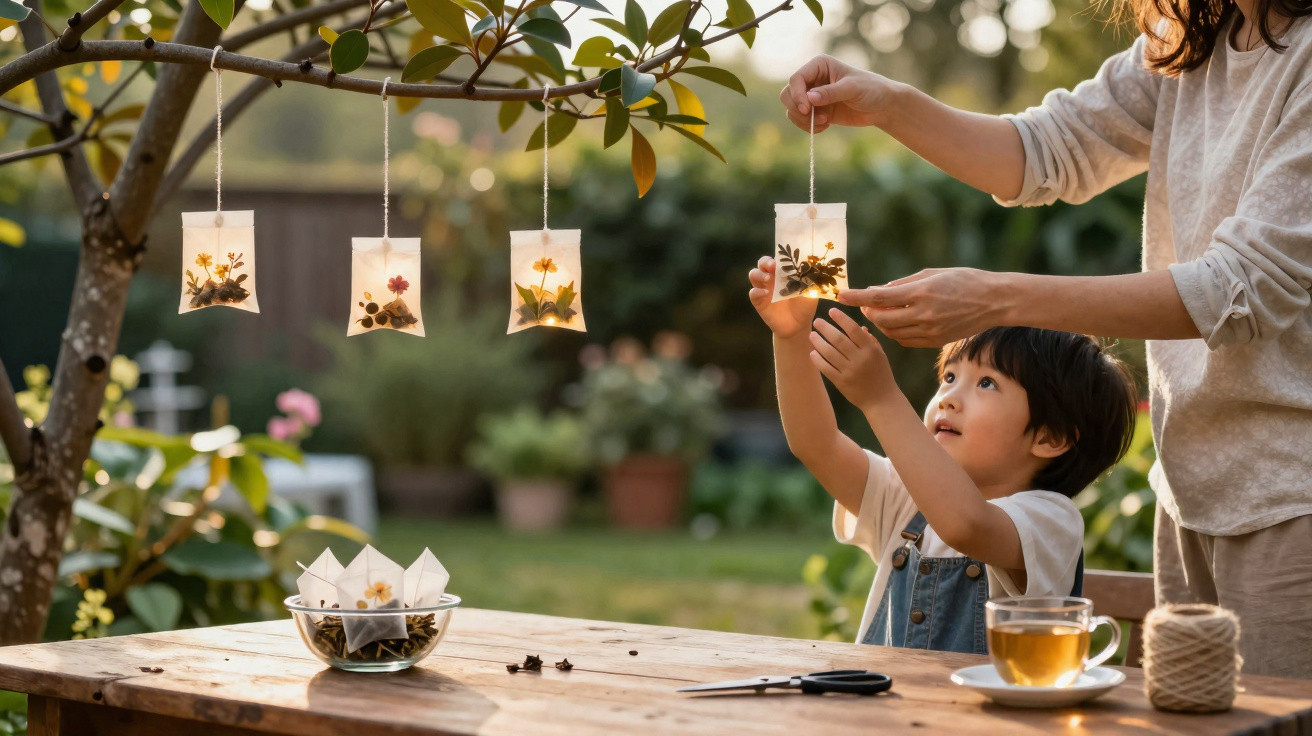
Used tea bags often go straight in the bin once you’ve brewed a cuppa. It’s a pity, because their slightly see-through paper, warm amber tint and neat size make them ideal for atmospheric garden lights. A DIY idea from the UK shows how you can turn spent tea bags into charming lanterns with very little effort - and without splashing out on pricey solar fairy lights.
Why used tea bags glow so well
If you drink a lot of tea, you already have plenty of the key material: paper tea bags. Once the tea leaves are removed and the bag is properly dried, what’s left is a delicate, lightly brown paper - and that’s exactly what makes this upcycling trick work.
"The paper from a dried tea bag acts like a natural filter: it softens harsh light and creates a gentle, golden glow."
Another plus: it costs nothing extra. While designer lanterns and solar garlands can quickly become expensive, these lights rely almost entirely on items you already have around the house. That keeps spending down and cuts waste - a double win that many people love.
Thousands of photos of handmade lights are now being shared on social media. In plenty of kitchens, there’s a jar beside the kettle where rinsed, dried bags are collected. A quick tea break turns into a stash-building habit for the next crafting session.
Step by step: how to make lanterns from tea bags
For a small, rectangular lantern you’ll need at least eight used tea bags. The more you have, the larger you can make your light. The important thing is that the outer bags are paper, not synthetic mesh.
Materials to gather
- Used paper tea bags (thoroughly rinsed and dried)
- White craft glue, diluted with a little water
- Pressed flowers or leaves, flat paper scraps or confetti
- Thin wooden sticks, skewers or lolly sticks
- LED tealights or a battery-powered string of lights
- Optional: a hot glue gun for stronger joins
Preparing the tea bags: the most important step
To turn the bags into sturdy “windows”, they need a little prep work:
- Right after brewing, carefully cut the tea bag open along one side.
- Scrape out the tea leaves and give the bag a quick rinse with water.
- Open the paper out completely and lay it flat on kitchen roll.
- Leave it to dry thoroughly - ideally overnight - so no moisture remains.
When the papers are fully dry, they look lightly marbled in brown and beige tones. Later, that natural pattern creates a lively glow - very different from plain, stark white paper.
Turning flat tea bags into a glowing mini tower
Creating the decoration - flowers, leaves, silhouettes
This is where you can get creative. Each tea bag becomes a translucent picture panel:
- Use a brush to apply a thin layer of diluted glue to the tea bag paper.
- Arrange pressed blooms, fern fronds, grasses or small paper pieces on top.
- Brush on another fine layer of glue to secure everything in place.
- Leave it to dry completely again, until the paper feels firmer and more stable.
Each finished panel will become one side of your lantern. If you prefer a simpler look, keep some bags plain and skip the decoration - you’ll still get a calm, beautiful lighting effect.
Building the frame and assembling the lantern
For the lantern to stand securely, the paper panels need a frame. Wooden sticks are ideal for this:
- Cut the sticks to match the edge length of the tea bag panels.
- Glue four sticks together into a rectangle to form one frame.
- Either glue the tea bag panel onto the back of the frame, or sandwich it between two frames.
- Make four of these framed panels for the sides.
- Join the sides into a rectangular tower using hot glue or strong craft glue.
"Important: when you’re using paper, there must be no naked flame inside the lantern. Only use LED tealights or battery-powered light sources."
Finally, place an LED tealight inside, or thread a small battery light string through the tower. The amber tone of the LEDs enhances the natural tint of the tea bag paper.
Where these handmade tealights look best in the garden
The finished lanterns are delicate because they’re mostly paper. Even so, they can work outdoors nicely - as long as you use a little common sense.
Good outdoor spots
- On the garden table as a central mood light
- On windowsills or low walls
- On steps and stairs to gently mark a path
- Hanging under a pergola or on a balcony, well protected from rain
If you use them outside, bring them back indoors after the gathering. Damp, wind and evening dew can quickly make the paper buckle or become brittle. Stored somewhere dry, the lanterns last much longer and can be reused for several summer evenings.
A family project instead of a throwaway habit
In some homes, the idea has already become a regular ritual: when the kettle goes on, used tea bags no longer head straight for the bin - they go into a collecting jar. Children can gather flowers, press them, and help with decorating later. Adults can handle the glue, building the frames and sorting the electrics.
That turns a simple hot drink into a small creative cycle: drink tea, save the bags, build the light. It’s an easy craft for rainy afternoons or school holidays, and by evening you’ve got a visible result.
What to watch for: safety and durability
Paper and lighting can work beautifully together, but you do need a few ground rules. Stick to them and you’ll enjoy your lanterns for longer.
- Use LEDs only: no real candles, no open flames, no incense sticks anywhere nearby.
- Keep them dry: store lanterns indoors after use, away from damp.
- Build sturdy frames: choose slightly thicker wooden strips so the tower won’t topple in the slightest breeze.
- Keep an eye on the power source: replace batteries in good time so they don’t leak.
If you want to use the lanterns in the garden more often, you can seal the wooden frames with a water-based clear varnish. It helps protect the wood from humidity without changing the look much. Leave the tea bag paper itself untreated so it stays nicely translucent.
Variations for balconies, patios and indoor spaces
The basic concept is easy to adapt. On a balcony, slim and elongated lanterns work well because they take up very little space. Indoors, small light boxes look great on a windowsill - for example with winter-themed paper shapes when it gets dark early outside.
If you fancy it, mix different tea types: black tea, green tea, rooibos - each one tints the paper slightly differently. It’s also worth playing with size: stacking two rows of bags creates a taller column, while smaller tea bags make a more delicate table light.
At heart, the idea shows how much potential there can be in everyday leftovers. Something that would normally be treated as waste becomes, with just a few simple steps, a piece that adds atmosphere - and a talking point for your next garden get-together. And if you love tea, you’ll almost always have the materials close to hand.

Comments
No comments yet. Be the first to comment!
Leave a Comment