
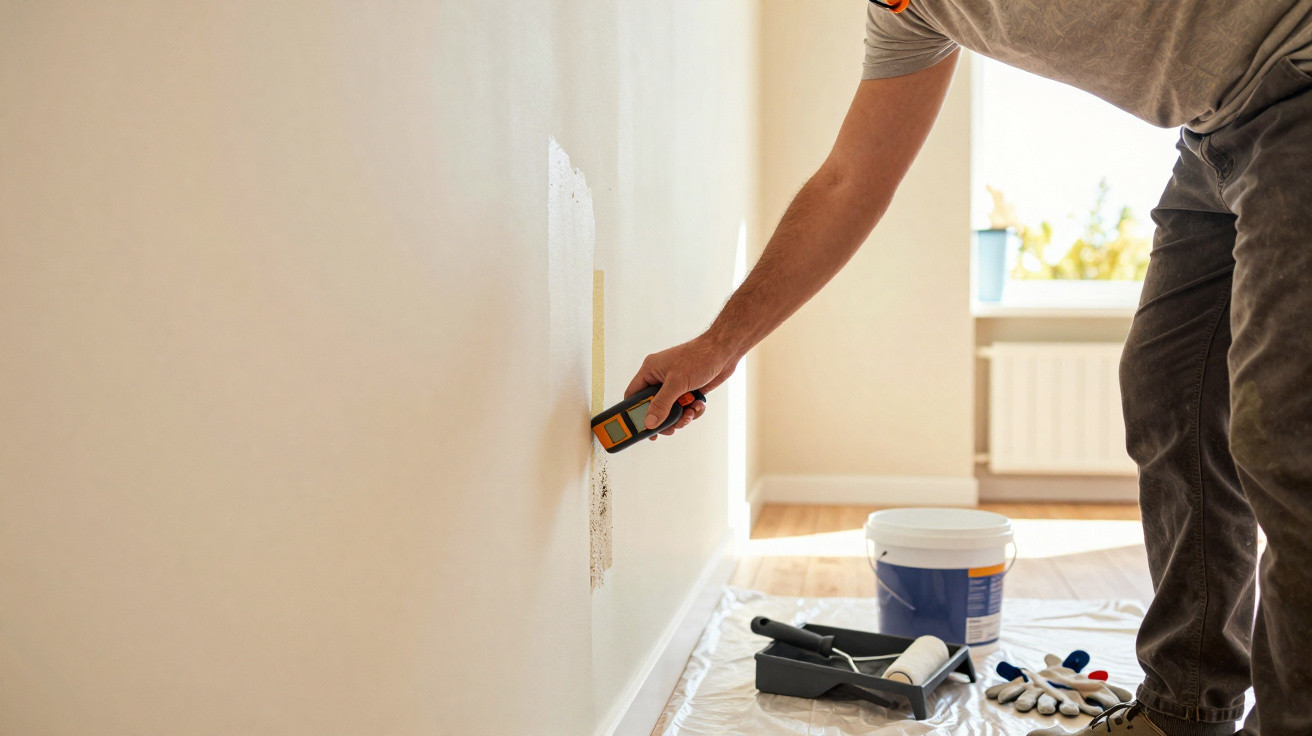
The appearance of damp on the wall often starts as nothing more than a small stain. Over time, though, it can lead to blistering plaster, flaking paint and even leave the surface sandy or visibly “eaten away”. Beyond the cosmetic annoyance, damp is a warning sign that part of the building is letting water through or trapping too much moisture in the air-something increasingly common in 2026, with denser developments, ageing façades, worn services and limited ventilation.
What causes damp on internal and external walls?
Professionals typically group the causes of damp in walls into three main categories: water ingress, capillary action and condensation.
Water ingress is moisture getting in from outside or from hidden services. It can come from driving rain penetrating cracks in external walls, leaks through flat roofs and slabs, poorly sealed joints, or failures in concealed pipework. A frequent clue is plaster that has swollen, or that sounds hollow when tapped.
With capillary action, groundwater rises up through masonry because there is no effective damp-proof barrier. This often creates a consistent horizontal “tide mark” close to the skirting board, sometimes accompanied by a whitish, powdery salt deposit (efflorescence).
Condensation, by contrast, is linked to indoor water vapour-hot showers, cooking and drying clothes-combined with insufficient airflow. It tends to show up in colder corners, behind wardrobes, and in bathrooms and kitchens.
Watch a video on the YouTube channel Master of Finishing about how to permanently solve rising damp and peeling walls caused by moisture.
How can you correctly identify the type of damp on the wall?
Pinpointing the source of a wall with damp is what makes the difference between a quick cosmetic patch and a repair that lasts. Staining that keeps returning in the same spot-especially near isolation valves, bathroom fittings or plumbing risers-often points to a leak. Even, uniform moisture rising from the floor suggests capillary action, while recurring mould during colder periods is more typical of condensation.
The signs below help with diagnosis and are also a red flag that you may need a more technical investigation:
- A lingering musty smell, or dark fungal growth in corners.
- Paint that repeatedly blisters, and plaster that crumbles when you rub it.
- Marks that return even after several coats of paint.
- Damp that appears soon after heavy rain, or after frequent shower use.
How to treat damp on the wall step by step
Once you have identified the cause-and fixed underlying issues such as roof defects, pipework leaks or inadequate ventilation-the repair itself follows a clear sequence. Start by protecting the room with dust sheets, opening windows for airflow, and wearing gloves, goggles and a mask, particularly if there is mould or lots of dust.
Next, strip back anything that is not firmly bonded: peeling paint, loose filler/skim coat, and any hollow or detached areas of plaster.
With the substrate exposed, scrub the surface to remove dust and efflorescence. Any mouldy sections should be treated with an appropriate fungicidal product, allowing the stated contact time. After that, the wall must dry properly-ideally naturally-using cross-ventilation, dehumidifiers or gentle heat before you apply a primer/sealer, carry out patch repairs with the right mortar, sand back, and finally repaint.
For bathrooms, kitchens and utility rooms, choose paint designed for humid environments and, where possible, include an anti-mould additive.
Which materials, tools and precautions ensure a good result?
When the wall is solid and dry, strengthen and level the surface with sealers and repair mortars suited to indoor or outdoor use. Apply them in thin coats and allow full curing to reduce the risk of cracking later. On older walls that are very porous, a penetrating stabilising primer can help bind the substrate-provided any degraded material has been removed first.
The right kit makes the job faster and helps the fix last longer. Useful tools include filling knives and scrapers, a hammer and cold chisel, wire brushes, sandpaper, trowels, plastering floats, rollers and paintbrushes. Equally important are the practical details: follow each product’s drying times, avoid rushing recoats, and keep up a basic habit of ventilating rooms. In day-to-day terms, these small steps reduce repeat failures and help keep the wall in good condition for longer.



Comments
No comments yet. Be the first to comment!
Leave a Comment